
The Ultimate Guide to Layout and Measurement Tools
In any project, whether it's a home improvement task or a professional construction endeavor, the accuracy and precision of measurements and layouts are crucial. To achieve this level of precision, one must rely on the right tools. In this comprehensive guide, we will explore the world of layout and measurement tools, from traditional rulers and tape measures to advanced laser measuring devices. Understanding the types of tools available, how to use them correctly, and how to maintain them are all essential aspects that will be covered in this ultimate guide. Whether you are a DIY enthusiast or a seasoned professional, mastering the art of layout and measurement tools is key to successful project outcomes. Join us on this journey to discover everything you need to know about these essential tools.
Understanding the Importance of Layout and Measurement Tools
Accurate measurements and precise layouts are fundamental to the success of any project, regardless of its size or complexity. Layout and measurement tools play a crucial role in ensuring that every aspect of a project is executed with precision and accuracy. These tools provide the means to measure dimensions, angles, distances, and levels, enabling the creation of well-planned and properly aligned structures.
Layout and measurement tools are not limited to any specific field or industry. They are utilized in various domains such as construction, architecture, woodworking, metalworking, engineering, and even in everyday DIY projects. Whether you are building a house, installing cabinets, crafting furniture, or erecting a steel structure, having the right layout and measurement tools at your disposal is essential.
By using these tools effectively, you can avoid costly mistakes, minimize rework, and achieve the desired outcome in a timely manner. They enable precise marking of materials, accurate cutting and shaping, and ensure that all components fit together seamlessly. Moreover, layout and measurement tools help in maintaining symmetry, balance, and alignment, resulting in visually appealing and structurally sound finished products.
Understanding the importance of layout and measurement tools goes beyond their basic functionality. These tools empower individuals to transform their ideas into reality, enabling them to create functional and aesthetically pleasing structures or objects. Whether you are a professional or an amateur, having a solid grasp of these tools will enhance your skills and boost your confidence in tackling any project.
In the following sections of this ultimate guide, we will delve into the different types of layout and measurement tools available, their usage, maintenance, and how to choose the right tools for your specific project needs. So, let's embark on this journey of discovery and unlock the secrets of layout and measurement tools to take your projects to new heights.
Types of Layout and Measurement Tools
Layout and measurement tools come in various forms, each designed to serve a specific purpose and cater to different measurement needs. Understanding the different types of tools available will help you choose the right ones for your project. In this section, we will explore the most common types of layout and measurement tools and their key features.
Rulers and Tape Measures
Rulers and tape measures are the most basic and widely used tools for measuring length, width, and height. They are available in different lengths and units of measurement such as inches, centimeters, and feet. Rulers are typically rigid and used for precise measurements on flat surfaces, while tape measures are flexible and can measure curved or irregular surfaces. Some tape measures even include additional features like a locking mechanism or magnetic ends for convenience.
Squares and Protractors
Squares and protractors are essential tools for measuring angles and ensuring accurate right angles. A square, also known as a carpenter's square or framing square, consists of a long arm and a shorter perpendicular arm, forming a perfect 90-degree angle. It is useful for checking and marking squareness, guiding saw cuts, and ensuring the alignment of corners. Protractors, on the other hand, are circular tools used to measure and draw angles. They are particularly handy for tasks involving angles other than 90 degrees.
Levels and Plumb Bobs
Levels and plumb bobs are indispensable tools for ensuring vertical and horizontal alignment. A level, often referred to as a spirit level, consists of a vial filled with liquid and an air bubble. By positioning the level on a surface, you can determine if it is perfectly horizontal (level) or vertical (plumb). This tool is crucial for tasks like installing shelves, aligning tiles, or hanging pictures. Plumb bobs, on the other hand, consist of a weighted object attached to a string. They are primarily used to establish accurate vertical reference lines.
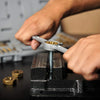
Calipers and Micrometers
Calipers and micrometers are precision measuring tools used for more detailed and precise measurements. Calipers come in different types, such as vernier calipers and digital calipers, and are used to measure dimensions such as length, width, and depth. Micrometers, on the other hand, are commonly used in engineering and manufacturing to measure extremely small distances or thicknesses. They provide high accuracy and can measure down to microns.
Laser Measuring Tools
Laser measuring tools have revolutionized the way measurements are taken, providing quick and accurate results. These tools use laser technology to measure distances, heights, and even calculate areas and volumes. Laser measuring devices are particularly useful for large-scale projects, such as construction or land surveying, where precise measurements over long distances are required. They offer convenience and speed, eliminating the need for manual calculations and tape measures.
Understanding the different types of layout and measurement tools available will assist you in selecting the most appropriate ones for your specific project requirements. In the following sections, we will delve into each type in more detail, exploring their usage, techniques, and best practices. So, let's dive deeper into the world of layout and measurement tools to unlock their full potential.
Related Article: From Millimeters to Meters: Understanding and Converting Measurement Units
How to Use Layout and Measurement Tools Correctly
Using layout and measurement tools correctly is essential to ensure accurate and precise results in your projects. In this section, we will discuss the proper handling and usage techniques for various types of layout and measurement tools. By following these guidelines, you will be able to maximize the effectiveness of your tools and achieve the desired outcomes.
Proper Handling and Usage of Rulers and Tape Measures
When using rulers and tape measures, it is important to handle them with care to avoid any damage or inaccuracy. Here are some tips for proper handling and usage:
- Ensure that the ruler or tape measure is clean and free from any debris that may affect the accuracy of the measurements.
- Place the ruler or tape measure firmly against the surface you are measuring to prevent any gaps or inconsistencies.
- Hold the ruler or tape measure steady and avoid any unnecessary movement while taking measurements.
- When using a tape measure, make sure the tape is fully extended and leveled to get accurate readings.
- Take multiple measurements and verify their consistency to ensure accuracy.
Understanding Squares and Protractors
Squares and protractors are used to measure and mark angles correctly. Here are some guidelines for their proper usage:
- When using a square, ensure that both arms are securely placed against the surfaces being measured to obtain accurate right angles.
- Double-check the squareness by flipping the square and checking if the measurements remain consistent.
- For protractors, align the center of the protractor with the vertex of the angle and read the measurement from the scale.
- Pay attention to the units of measurement on the protractor (degrees or radians) and use the appropriate scale.
Utilizing Levels and Plumb Bobs
Levels and plumb bobs are crucial for achieving accurate vertical and horizontal alignments. Follow these tips for their proper usage:
- When using a level, ensure that the bubble is centered within the vial to indicate a level or plumb position.
- Check the level at different points along the surface to ensure consistency.
- Use a plumb bob to establish vertical reference lines by allowing it to hang freely and observing its position.
- Keep the plumb bob steady, avoiding any unnecessary movement that may affect the accuracy of the alignment.
Efficient Use of Calipers and Micrometers
Calipers and micrometers require careful handling to obtain precise measurements. Here are some guidelines:
- Ensure that the calipers or micrometer jaws are clean and free from debris for accurate measurements.
- Gently close the jaws of the caliper or micrometer around the object being measured without applying excessive force.
- Take multiple measurements and verify their consistency to ensure accuracy.
- Use the appropriate scale or digital display to read the measurements accurately.
Maximizing the Use of Laser Measuring Tools
Laser measuring tools offer convenience and speed in obtaining measurements. Here are some tips for their efficient usage:
- Position the laser measuring device on a stable surface to avoid any movement that may affect accuracy.
- Follow the manufacturer's instructions for proper laser alignment and distance measurements.
- Be mindful of any obstacles or reflective surfaces that may interfere with the laser beam.
- Take multiple measurements from different angles to ensure accuracy and consistency.
By following these guidelines, you will be able to harness the full potential of layout and measurement tools and achieve accurate and precise results in your projects. In the next section, we will explore the importance of maintaining and caring for your layout and measurement tools to ensure their longevity and optimal performance.
Related Article: Developing Accuracy in Laying Out Projects
Maintenance and Care for Your Layout and Measurement Tools
Proper maintenance and care for your layout and measurement tools are essential for their longevity and optimal performance. In this section, we will discuss the steps you can take to ensure that your tools remain in good condition and provide accurate measurements throughout their lifespan.
Cleaning and Storing Your Tools
- After each use, clean your tools to remove any debris, dust, or moisture that may have accumulated. Use a soft cloth or brush to wipe off any dirt or residue.
- For rulers, tape measures, and squares, ensure that they are dry before storing them to prevent rust or corrosion. If necessary, wipe them with a dry cloth or use a mild cleaning solution.
- Clean the vials of levels and plumb bobs using a damp cloth or specialized cleaning solution. Ensure that the vials are free from any dirt or liquid that may interfere with their accuracy.
- Calipers and micrometers should be cleaned with a soft cloth or brush. Use a specialized cleaning solution or rubbing alcohol to remove any grease or contaminants.
- Laser measuring tools should be wiped clean with a soft, lint-free cloth. Avoid using harsh chemicals or abrasive materials that may damage the laser components.
- Store your tools in a dry and organized manner, away from extreme temperatures, humidity, or direct sunlight. Consider using protective cases or toolboxes to prevent any accidental damage or misplacement.
Preventing and Addressing Tool Damage
- Handle your tools with care and avoid dropping them or subjecting them to excessive force. This can cause misalignment, damage to the measurement scales, or internal components.
- Avoid exposing your tools to extreme temperatures or moisture, as this can lead to rust, corrosion, or warping.
- Regularly inspect your tools for any signs of damage, such as bent rulers, cracked vials, or misaligned jaws. Address these issues promptly to prevent further damage and ensure accurate measurements.
- Replace any worn-out or damaged parts, such as blades on tape measures or worn-out batteries in laser measuring tools, to maintain their functionality and accuracy.
- Follow the manufacturer's instructions for any specific maintenance requirements or calibration procedures for your tools. This ensures that they are operating within the specified tolerances.
Regular Inspection and Calibration
- Periodically inspect your tools for accuracy by comparing their measurements against a known reference. This can be done using a calibration block or a certified measuring device.
- If you notice any discrepancies or inconsistencies in your measurements, consider calibrating or adjusting your tools. Consult the manufacturer's guidelines or seek professional assistance if necessary.
- Laser measuring tools may require periodic calibration and software updates to maintain accuracy. Follow the manufacturer's recommendations for calibration intervals and procedures.
By implementing these maintenance and care practices, you can extend the longevity of your layout and measurement tools, ensure their accuracy, and enhance their performance. In the next section, we will explore the process of choosing the right layout and measurement tools for your project, taking into consideration your specific needs and requirements.
Related Article: Tips for Maintaining and Calibrating Measuring and Layout Tools
Choosing the Right Layout and Measurement Tools for Your Project
Choosing the right layout and measurement tools is crucial to ensure the success of your project. In this section, we will discuss the factors to consider when selecting tools that align with your specific project needs and requirements.
Assessing Your Project Needs
- Determine the nature of your project: Consider whether you are working on a construction site, woodworking project, metalworking task, or any other specific field. Different projects may require different tools.
- Identify the measurements and layouts required: Evaluate the types of measurements and layouts you will need to perform. This includes understanding the dimensions, angles, and levels that need to be accurately measured.
- Consider the complexity of your project: Determine if your project involves intricate or precise measurements that may require more advanced tools such as calipers or laser measuring devices.
Comparing Tool Specifications and Features
- Research different brands and models: Look for reputable brands known for their quality and accuracy. Read reviews and compare specifications to find the tools that best suit your needs.
- Consider the measurement range and accuracy: Check the measurement range and accuracy of the tools you are considering. Ensure they can handle the measurements required for your project.
- Evaluate the ease of use: Consider the user-friendliness of the tools. Look for features such as easy-to-read scales, clear markings, intuitive interfaces, and ergonomic designs.
- Assess the durability and quality: Examine the materials used in the construction of the tools. Look for durable and robust options that can withstand the demands of your project.
- Look for additional features: Some tools may come with additional features like digital displays, data storage capabilities, or connectivity options. Assess if these features are beneficial for your project.
Budgeting for Quality Tools
- Set a budget for your tools: Determine the amount you are willing to spend on your layout and measurement tools. Consider it as an investment in the accuracy and success of your project.
- Prioritize quality over cost: While it may be tempting to opt for cheaper tools, prioritize quality and accuracy over cost. Investing in high-quality tools will save you time and money in the long run.
- Consider the longevity of the tools: Evaluate the durability and lifespan of the tools. Investing in durable tools may be more cost-effective in the long term, as they will require fewer replacements.
By carefully considering your project needs, comparing tool specifications and features, and budgeting for quality tools, you can make informed decisions when choosing layout and measurement tools. Remember that the right tools will enhance your efficiency, accuracy, and overall project outcomes.
Get the Best Out of Your Layout and Measurement Tools
layout and measurement tools are essential for achieving accurate and precise results in various projects. By understanding the different types of tools available, learning how to use them correctly, maintaining and caring for them, and selecting the right tools for your specific project needs, you can unlock their full potential and elevate your project to new heights. So, equip yourself with the knowledge and tools necessary to excel in your projects and enjoy the satisfaction of creating with precision.
Related Topics
How to Repair Stripped Threads Using a Tap and Die Set
Stripped threads can be a common issue when working with metal parts, especially in automotive re...
Read More
Understanding Tap and Die Thread Standards
Tap and die sets are essential tools used in various projects to create threads on screws, bolts,...
Read More
Tap and Die Set Materials: Which One Is Right for You?
If you're looking to understand tap and die sets, you've come to the right place. These tools are...
Read More