Expressing Your Style: Designing Personalized Wood Art
Wood carving is a timeless craft that allows individuals to transform a simple piece of wood into a work of art. One of the most captivating aspects of wood carving is the ability to create personalized patterns that reflect the individual's unique style and creativity. In this comprehensive guide, we will delve into the art of DIY wood carving patterns, exploring techniques, tools, and design principles that will empower you to express your style through personalized wood art.
Understanding Wood as a Medium
Before embarking on your wood carving journey, it's crucial to understand the characteristics of the wood you'll be working with. Different types of wood have distinct grain patterns, hardness levels, and carving properties. This chapter will provide a detailed overview of popular carving woods, such as oak, mahogany, and pine, helping you choose the right medium for your project based on its intended purpose and your skill level.
Oak
Oak is one of the most commonly used woods for carving due to its strength and durability. It has a pronounced grain, which can add a beautiful texture to your finished piece. However, it's also a very hard wood, which can make it challenging for beginners to work with. It's best suited for projects that require durability and longevity, such as furniture or outdoor sculptures.
Mahogany
Mahogany is a favorite among wood carvers because of its straight grain and medium hardness. It's easier to carve than oak but still offers a good level of durability. Mahogany's rich, reddish-brown color makes it an attractive choice for decorative pieces. It's well-suited for detailed carving projects, such as intricate relief work or ornate furniture.
Pine
Pine is a softwood, making it a great choice for beginners. Its softness allows for easy carving and shaping, although it's less durable than hardwoods like oak or mahogany. Pine has a pale color with subtle grain patterns, providing a blank canvas for projects where you want the carving itself to stand out. It's ideal for practice pieces or projects that won't be subject to heavy use or outdoor elements.
Choosing the right wood for your project will depend on a few factors, including the level of detail required, the intended use of the piece, and your own skill level. Beginners might find pine or mahogany more manageable, while experienced carvers may prefer the challenge and durability of oak.
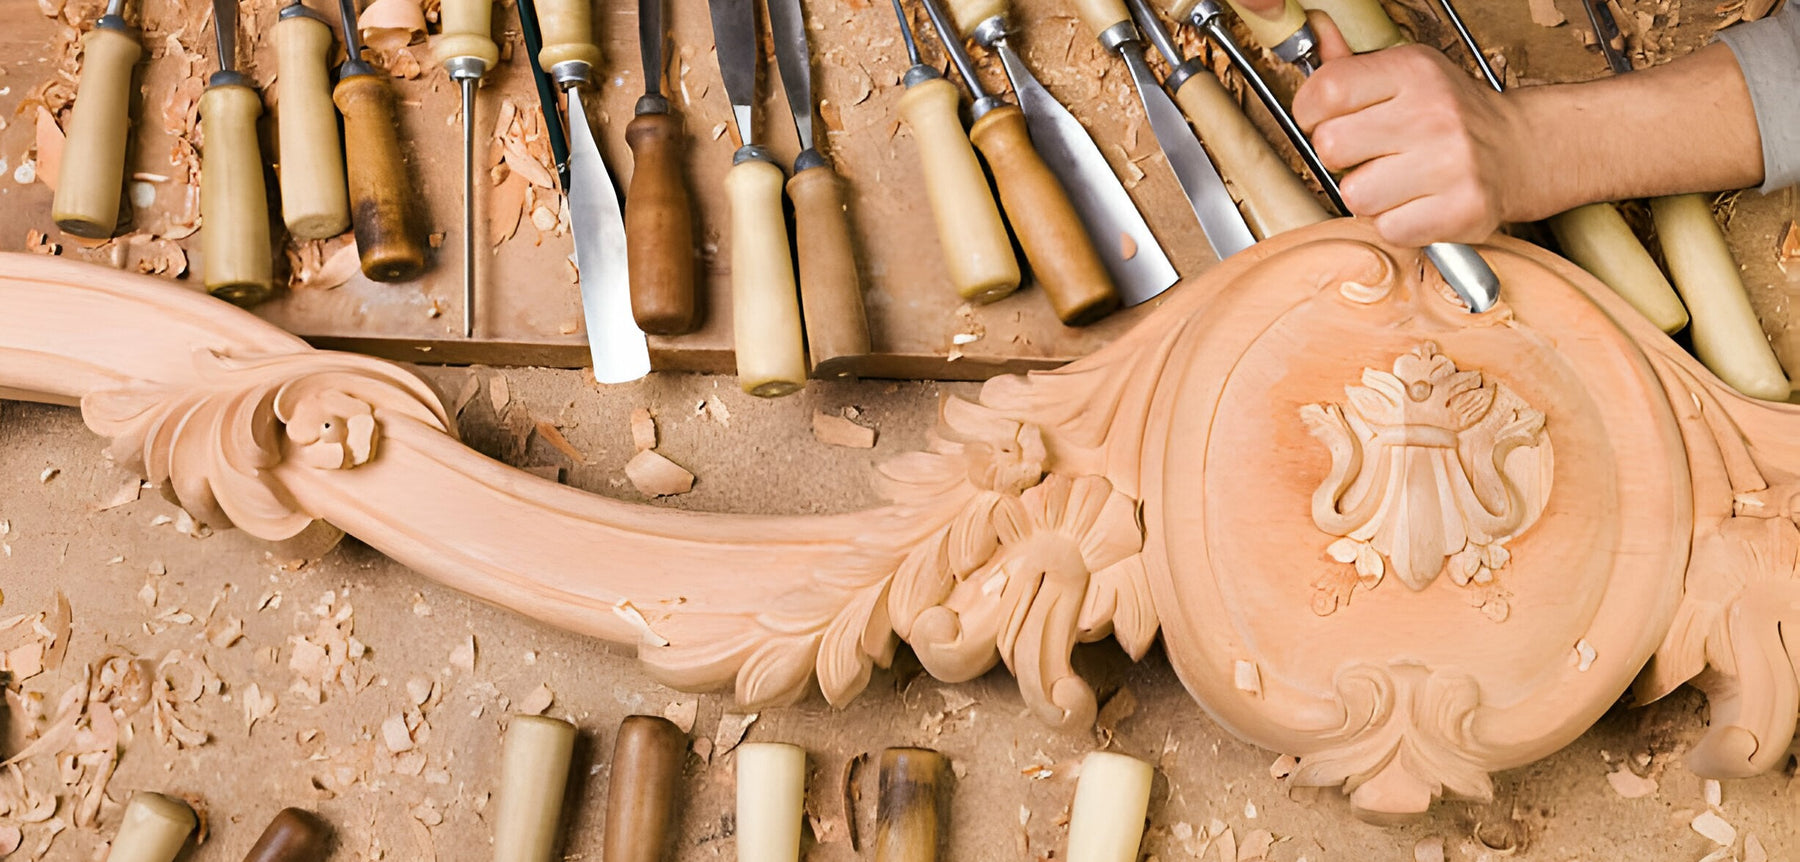
Must-Have Tools for Wood Carving
To carve wood effectively, you need the right tools. Here are some essentials:
- Chisels: These are perfect for large carvings. They come in different shapes and sizes for various carving needs.
- Gouges: Unlike chisels that have a flat edge, gouges have a curved cutting edge. They are used for shaping and hollowing out areas in a carving.
- Mallets: A mallet is used to drive the chisel or gouge into the wood. It provides more control and force than using your hand alone.
- Knives: Carving knives are essential for detail work and whittling. They come in different shapes and sizes, each designed for specific tasks.
Fundamental Techniques for Wood Carving
There are several techniques in wood carving, but two of the most common are chip carving and relief carving:
- Chip Carving: This involves removing small "chips" from the surface of the wood to create patterns and designs. It's an excellent technique for beginners as it only requires a basic knife set.
- Relief Carving: This form of carving involves carving figures into wood. The carved project remains attached to the wood. This technique is more complex than chip carving and often requires a variety of tools.
Design Concepts for Wood Carving Patterns
Design principles like balance and contrast are crucial when creating wood carving patterns:
- Balance: This refers to the arrangement of elements in a way that doesn't tip the visual weight of the design. It can be symmetrical (mirrored) or asymmetrical.
- Contrast: This involves varying elements of your design to make them stand out. It could be through texture, size, or shape.
Personalized Wood Art: Sourcing Inspiration
In wood carving, inspiration can come from anywhere. Nature, personal experiences, or cultural motifs can serve as great starting points. Looking at the work of other wood carvers can also spark ideas.
Structuring Your Wood Carving Project
Planning is key in a successful wood carving project:
- Sketching the Design: Before you start carving, draft your design on paper. This will serve as your guide throughout the process.
- Selecting the Right Wood and Tools: Depending on your design, choose the appropriate wood and tools. Hardwoods are great for intricate designs, while softwoods are ideal for beginners.
Creating DIY Wood Carving Patterns
With your plan in place, you're now ready to carve:
- Transferring the Design: Use carbon paper to trace your sketch onto the wood.
- Carving the Design: Start by carving out large areas, then slowly work towards the smaller details. Always carve in the direction of the grain to avoid splintering.
- Troubleshooting Common Issues: If you make a mistake, don't panic. Many errors can be fixed by incorporating them into the design or filling them with a wood filler.
Our exploration of the art of DIY wood carving patterns, it's essential to emphasize the transformative power of this ancient craft. As you embark on your wood carving journey, remember that the true beauty of personalized wood art lies not only in the finished product but also in the creative process itself.
Wood carving offers a unique avenue for self-expression, allowing you to convey your personality, emotions, and individuality through the medium of wood. The satisfaction derived from creating something unique with your hands is unparalleled, and the skills acquired during this journey are lifelong assets.
Moreover, the art of DIY wood carving patterns serves as a gateway to a supportive and vibrant community of fellow artisans. Engaging with this community can offer valuable insights, feedback, and inspiration to further enrich your artistic endeavors.
Related Article: The Art of DIY Wood Carving Patterns
CONCLUSION
As you continue honing your skills, consider exploring advanced techniques, experimenting with various wood types, and pushing the boundaries of your creativity. Remember that each stroke of the chisel and every carved detail contributes to a narrative – your narrative – etched into the timeless medium of wood.
This guide is an invitation to embrace the artistry within you. Through personalized wood art, you have the means to tell your story, leave a lasting legacy, and contribute to the rich tapestry of the wood carving tradition. May your future projects be a testament to the craftsmanship, dedication, and distinctive style you bring to the world of DIY wood carving. Happy carving!
Related Topics

How to Use Tap and Die Sets for Creating Custom Threads
Using tap and die sets can be a rewarding way to create custom threads for various projects. Thes...
Read More
How to Repair Stripped Threads Using a Tap and Die Set
Stripped threads can be a common issue when working with metal parts, especially in automotive re...
Read More
Understanding Tap and Die Thread Standards
Tap and die sets are essential tools used in various projects to create threads on screws, bolts,...
Read More